Showing posts with label recycled. Show all posts

Monday, January 21, 2013

Upcycle Project: Overall's to Dress


Making a dress from overall's.

So the leggy Miss is growing and growing. I can't keep up and neither can her pant legs. The overalls were too short in the leg but still roomy around her torso so we decided to make a dress out of them.
As for the pant leg leftover's we have some future ideas for those too. Here's a quick tutorial to show you how. You don't need a pattern, just some basic sewing skills.

So let's get started.

You'll need:

* Overall's / Coverall's
* Fabric 110cm wide (about 110cm long)
* Quick unpick
* Scissors
* Sewing Machine
* Thread (I used dark blue and cream)
* Tailor's chalk or a pen

Optional
* Buttons to replace denim studs OR
* Covered button kit to replace denim studs

This tutorial is a guide to make a pair of overall's into a dress. If you need some extra help or some more info if I didn't explain it very well, then please contact me and I'll do my best to help you out.


1. First work out where the waist of your overalls sit on the kid. Mark this with the chalk or pen and then cut leaving a seam allowance. I use 1.5cm seam allowance.


2. Unpick the belt carriers and if you care to unpick the bottom seam at the front to reduce bulk when sewing your skirt on. This isn't necessary but it will make it easier to sew and give you a cleaner finish.


3. Measure the length you want your skirt to be (mine is 50cm) and cut two lengths. 


4. Sew a gather stitch across the top of both pieces. A gather stitch is a wide length stitch which allows you to pull the thread on the ends and gather or ruffle the fabric. Make sure the gather stitch is closer to the raw edge than your seam allowance. I usually make mine about 1cm.


5. Pull one of the threads on one side of the fabric to gather the fabric. Attach one piece to the front of your overall's bib. Adjust the gathers to fit evenly.


6. I'm stitching on top with dark blue thread so I can make sure I stitch in the channels left from the old thread. The back doesn't really matter (here is the back with the cream thread)


7. Double check your seam allowance for the back of the overall's. I have left a 1.5cm seam allowance and have made sure my button holes matched up so the skirt would too.


8. Gather the skirt panel and attach it to the back of the overalls. Then finish this edge with an overlocker/serger or a zig zag stitch.


9. Line up your skirt panels, when you're happy they match up then stitch them together leaving a gap of about 5cm at the top nearest the overall's bib. This will allow extra room when putting the dress on. I didn't worry about finishing the edges of the skirt itself as it is the selvedge edge and wont fray. 


10. Starting from the front just beneath the overall's bib at the side of the skirt, stitch the side seam down and across the seam join and up to the back of the skirt panel. Keep stitching a top stitch across the back of the skirt (this will keep the denim from sticking up and making the skirt look unruly!) and then repeat the other side finishing just below the bib of the overall's.


11. Hem the dress. I just did a double fold narrow hem.


12. Now your dress can be considered finished! I removed all the old denim studs and zig zag stitched the holes so I could add my own buttons.


13. Attach your new buttons. 


14. Wear!


Monday, November 14, 2011

TUTORIAL: Recycled Paper Christmas Tree Decoration


Hi! Welcome to the beginning of "Christmas with Kitty Boo Boo". I love a handmade Christmas with all the making and creating and I love sharing the joy of making and creating too. From  now through to Christmas I will be sharing some of my Christmas decoration ideas. I hope you find something you like to make and I'd love to hear your feedback and see your versions! Please feel free to link back to my blog!

Note: All instructions and photographs are my own and copyrighted. If you choose to use them please credit them back to me. Thanks

Recycled Christmas Trees with Glitter


Materials:

* Small magazine or book
* Gold Spray Paint
* Glitter
* Scissors
    Instructions:
    1.    Fold the spine of the magazine so that it is broken

    2.    Fold the pages of the magazine in towards the spine one at a time. Then fold them all in again so the fold is smaller.


     3.    Use scissors to cut the irregular shape from the bottom of the pages. You could leave this attached but if the paper of the magazine is soft or thin the tree will be unstable
           
     
    4.    Spray the small tree with the gold paint and dust with glitter


     Now you have a gorgeous table centerpiece.
     
    Other ideas:

    Spray with adhesive glue (so you can still see the text) and then sprinkle with glitter

    Sunday, February 20, 2011

    Recycled Story Book Bunting ...

    For nearly a year now I have been making bunting from books that have been damaged or badly treated. It took me quite a lot to make that first cut, and still sometimes a piece of my heart aches when I start to rip or cut.
    But the end result is a beautiful repurposed item ready to be loved by someone new.

    They have been used as bedroom decorations, party decoration, and early reading tools.

    These are for sale in my Etsy store Kitty Boo Boo Design. They haven't been lasting long though! I am currently in the process of stitching up about 40 new ones ... take a peek below ... send me a message if you're looking for something in particular!

    Alice in Wonderland

    Beauty and The Beast

    Jack and The Beanstalk

    Little Red Riding Hood

    Adventures in Space

    Snow White

    Monday, June 28, 2010

    BrisStyle Indie Eco Markets ... reuse, repurpose, recycle

    On Saturday July 10th (which also happens to be my birthday) BrisStyle will be having our first ever ECO market with special guest stall holders Reverse Garbage and sponsor Peppermint Magazine and foodie stallholder Hellhound (vegan) Hotdogs.


    For these markets I wanted to really challenge myself.

    I have always tried to utilise as much of my offcuts and scrap fabric pieces as much as possible, however in the last few months I have been saving more and more of my smaller pieces after making garments in the hope that I can utilise these and create something beautiful instead of more landfill.
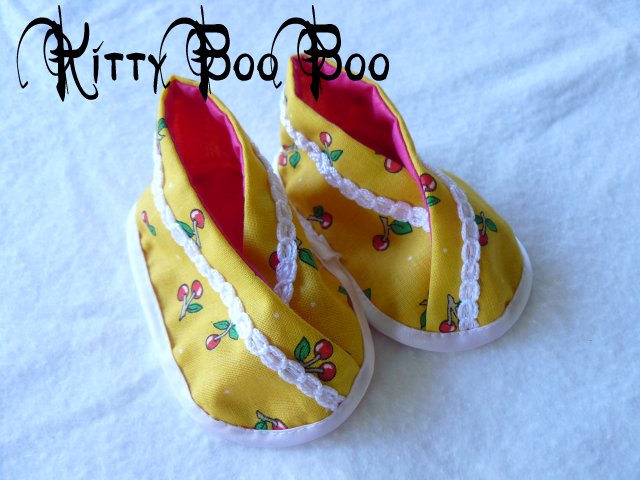
    I have been making baby bootees for a few years, and over the last year wrist cuffs for adults and kids from the larger pieces of remnants after making clothes.


     But to add to my hair accessories and use up all those little fiddly bits this is what I have managed to create so far from the strips of excess cut from the straps of my sundresses and braided together with silk petals and repurposed buttons ...


    plus I am also making some beautiful wrist corsages and chokers ...

    and also some wee gorgeous brooches ...


    and still to finish and photograph are some bracelets and bangles from repurposed household cast-aways and some gorgeous dresses from Men's shirts ...


    On the paper side of things I have been cleaning out the kids books (the damaged and sadly beyond repair) to make some bunting and cards ...


    So that's a little taste of what I'll be bringing with me to the BrisStyle Indie Eco Market on Sat July 10th. I'll be in the communal co-op area with a table of my own so stop by to have a look and maybe buy something! Or just come and say Hi!

    Monday, August 10, 2009

    First Projects ... Crazy Patchwork Quilt

    Okay ... so I had been sewing for a few years but I had only made a handful of kooky clothes for myself ...

    * like the electric blue velvet tutu skirt attached to a black and silver corset
    * or the big sunhat I made covered in black lace and ribbon (it's a goth thing)
    * the spiderweb leggings
    * the purple satin swing dress

    etc etc,
    I think you get the picture.
    Never with a pattern and always sewn by hand.

    So after I bought my first machine I use to make bags. They were pretty popular with my family (you have to love your biggest fans!) and I think my sisters and mum still tote some of these around! Then I found it easier to make clothes but I missed the hand sewing so explored embroidery for a while.


    First Quilt Project 2002


    When I was due with Erin I decided to make a quilt. It's not very attractive but it was the first project I explored out of my depth. It was a crazy patch quilt.

    I used only recycled fabrics and made the patches from old garments and linen from my childhood.


    Some of the pieces are maternity clothes of my mums and some maternity clothes of mine. The backing is an old cot sheet of mine and the buttons are all vintage. The threads were also the legacy of one of Pete's great Aunts.


    I was very proud of it but then it was washed in the WASHING MACHINE by a 'helpful' person and it shrunk in all the wrong places. Sad but I still have a soft spot in my heart for this little number ...


    There are nine crazy patches. Each made with the same fabrics but embellished with different coloured trims and stitches. Blue, Black, Red, Green, White, Yellow, Brown, Purple and Pink.


    What was your first adventurous project?